Head Actions are a part of the Head section in body of the <HEAD>.
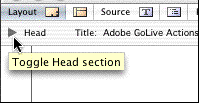
Fig. 1
Click on the triangle to the left in the page window (just below the Layout tab) and the window will expand.

Fig. 2
This is the Head section of the HTML page.
The default Meta tags of the Head section are the tag, the tag and one tag staring the HTML generator, in this case Adobe GoLive 7.0. They appears as #ffde9c colored rectangles.
The best way of learning is to see what is going on.
So let's take a sample with the Preload Image.action. This Action work as a Head Action only.
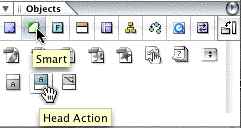
Fig. 3
Add a new Head Action.
First you bring up the Objects palette (Menu bar > Window > Objects). Select the Objects tab and select the second subtab Smart, here there are several options, select the one called Head Action.

Fig. 4
Drag&Drop this into the open Head section.
Again GoLive gives you more options on how to apply things.
With the Head section open and highlighted, double-click the Head Action icon.
The third option is to drag the Head Action over the triangle, this will open the Head section.
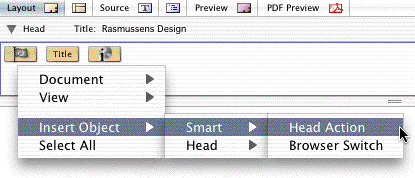
Fig. 5
Yet another option is to use the contextual menu.
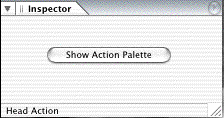
Fig. 6
Once applied, this button will turn up in Inspector palette. Click the button, this will bring up the Rollover & Actions palette.
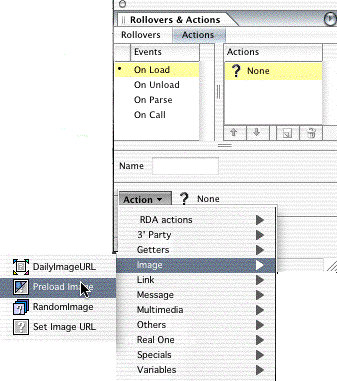
Fig. 7
Click the Actions subtab under the Rollovers & Actions tab. The On Load will be preselected.
Go to the Image folder and select the Preload Image.action.
It will not be meaning full to use else but the On Load option.
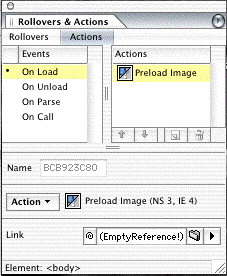
Fig. 8
To apply the image, you want to preload, you have three options.
In the Link field "(EmptyReference!)" in the User Interface.

Fig. 9
The icon that PreLoad Image.action has will appear, this way you are always able to identify which Head Action holds a specific Action. The change of icon goes for "Body Actions" as well.
Tip!
If you want to preload several images, you can Drag&Drop several Head Actions into the Head Section and apply a Preload Image.action to each. However, this will clutter the Head section with a lot of Head Actions and can be difficult to inspect.
Instead, Drag&Drop a Head Action to the Head section. Click the Action button and select the Action Group.action in the Specials folder and then apply your Preload Image.action into this action as many times as needed. Now you've got all the preloading gathered in one Head Action, as a set of Actions, nice and tidy.
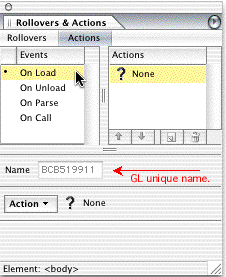
Fig. 10
You have four options on how to trigger a Head Action
On Load, On Unload, On Parse and On Call.
All Head Actions are triggered on On Load by default.
On Load — The Action will be triggerd when the page has loaded into the browser and before any other Actions. This you can do with several standard Actions. Each time you like to trigger an Action when the page loads, use On Load. Actions that trigger on On Load is for example Preload Image.action, ScrollStaus.action or a Browser detection, it can be some sort of a pop-up window etc. It's only your imagination that sets the limit and the Action type of course.
On Unload — The Action will trigger when the page is closed. It can be a "Thank you for visiting" alert box or a pop-up window that holds you to the site, which is very annoying.
On Parse
Some Actions are only working when set to On Parse like the CSS Write.action. When Head Actions are set to On Parse they will trigger, when the browser reads the line, that is, a little before the entire page is loaded.
The three first above-mentioned options on executing Actions, more or less are self-explanatory.
On Call — Calls the Action later in the browser session by using the Call Action.action found in the specials folder. (Open the show_hide_explained.html page in GL and look in the Head section). When you create an On Call action, Adobe GoLive assigns a default unique name that appears in the Name text box above the Action button (Fig. 10). You can overwrite this name with a description, that is easier to retrieve. The name you enter here must be unique, that is, the name must not be used by any other variable or Action in the source code of the page. On Call, a very powerful tool.
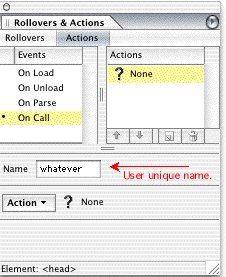
Fig. 11
Lots of GoLive users do not understand this feature to it's full extend.
In general you will set Actions to On Call when you want to reuse an Action or sets of Actions (must always reside in the Head section) and you don't want to set them up more than once, like image protection or you want to show/hide several Layers in one go.
So let's dwell a little on the On Call used in conjunction with a visitor triggerd interaction.
Let's say you want to create a DHTML menu in which some menu items will appear in a Layer, either when the visitor enters or clicks an image, a rollover button or text link etc.
You usually have more than one menu item and you have to show/hide those when the visitor enters or clicks other menu items.